Thursday, August 28, 2008
My Little Actress!

Wednesday, August 27, 2008
Tuesday, August 26, 2008
HAPPY BIRTHDAY MCKENZIE
Here is a picture of my sweet baby girl McKenzie!
 and here is a picture of her not being so sweet. Look at that Glare!!! She must get it from Daddy *wink wink*
Pictures are compliments of my Good friend Justin! Thanks
Scroll down to my previuos post for something more creatively paper stimulating!
Hi
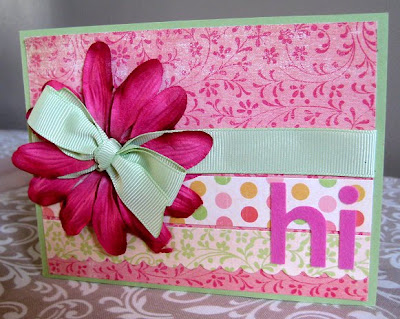 I LOVE playing around with the My Minds Eye papers!! This card has a paper background and then the pattern strips are the tres Jolie cardstock sticker borders. Love them too!
 The letters on here are from Amy Butlers Line of Flocked Alphabet diecut stickers from K&Company.
Have a great day!!
Monday, August 25, 2008
Flocked Hello
 This is a chipboard piece from SU's on board blossoms and basics (I think that is what it is called) I brudhed lemon Yellow Liquid earls over it and let it dry. Then I took a clear flower from the Heidi Swapp Clear Gel Blossoms and raised it up with dimensionals. It had a ton of holes in it around the center so I added the Everyday Blessings pattern paper underneath the gel blossom and then put the mini silver brads from queen and co in each and every hole. Then I finished it up with a random buttom tied with yellow twine.
Sunday, August 24, 2008
Lady in Red!
 This picture is in a park across from our City Hall. Very Neat, and I am the one standing behind the bride!
 Big Funky Tree in one of our city's biggest parks. I need Family Photos done in this tree!
 This was funny. He took a picture of them kissing while we were standing there and the grooms oldest daughter (one in black on the left hand side) made a gagging noise so we all did it for the next picture. This truly is one of my favorites...HAHAHA
 The Brides bouquet on a vintage brass looking chair. I LOVE how the sunlight dances in and out of the picture but never takes the spotlight from the flowers! Great shot JQ!
Saturday, August 23, 2008
Another Layout!
 This is McKayla, my oldest Daughter (4). I was taking pictures of the Lillie's in our yard and she just HAD to get in the picture. I shared these photos a while back but had to share the page I made with them.
 The quote card says "Cherish forever what makes you unique" and that she is indeed!
Friday, August 22, 2008
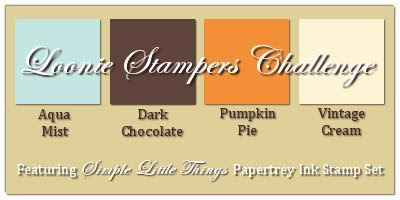
Loonie Stampers Challenge #5
 Now, I also cheated a bit. About 3 weeks ago when I had the pleasure of meeting Char in MH, she brought me some printed pages of Becky's Demi Design papers. So This pattern had the perfect colors and I REALLY wanted to use more of her papers. I thought this was a good way to multi task while stamping...LOL
So I first cut the AM paper and inked the edges, matted it on white. Then I took Becky's pattern paper which is called "Recorded" from the Piffaro line. Seriously you NEED to go get them from her blog. I cut the paper into a diagonal to go across the page, then I trimmed all around the edges a bit more. Next I chopped it into strips, also cutting the white that separated the rows off. Then I inked each edge and arranged them over top the AM paper.
Then flower from Garden of life is embossed in Chocolate scented embossing powder, which sadly doesn't smell after it is heated, Bummer! I added the sentiment in Dark chocolate ink (PTI) and the lemon tart grosgrain ribbon. As a finishing touch I took my new White Opal & Lemon Yellow Liquid Pearls and made little dots.
Be sure to check in on my LSC Buddies to see what they have created!! If you are up to playing along please do and leave a link in a comment for us!! We would all Love to see what you do with this combo!! Little shout out to Maria & Donelda who I KNOW like to play along!!
Well Folks I am currently on vacation at Charlene's house but I do have a few posts ready to go for you!! See you all soon!
Thursday, August 21, 2008
From Our Anniversary!!


Tanis & Mark got us these awesome coffee mugs that have a little stir spoon that fits right into the handle (perfect for my Tim Horton's French Vanilla Capp!!!!) Also an elegant wine decanter, I Love it and cant wait to use it. Thanks You two!!!
Wednesday, August 20, 2008
Papertrey Ink Honorable Mention

Tuesday, August 19, 2008
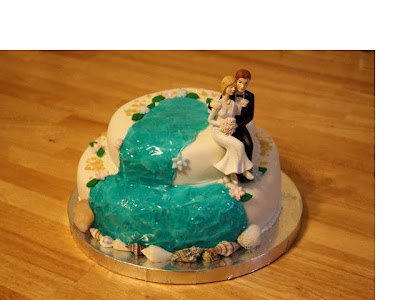
It's all about the cake!

Monday, August 18, 2008
7 Years Ago...


My Mommy Made my dress from scratch!!

Here is me and my 3 Brothers. From left to right: Cory (oldest), Pj (Patrick Junior, third) Myself (I am the youngest) and Chris (second oldest) and the four of us are still extremely close!!
Friday, August 15, 2008
Oh! Butterflies
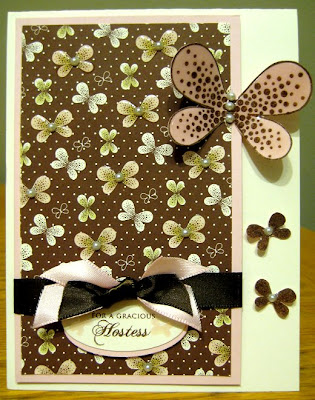 I started this card on the PTI Vintage Cream, which I have to say I have been neglecting. What can I say I Love the Stampers Select so much, Thanks Char for turning me on to it *wink*. I took out the Chocolate remix paper pack that is to DIE for and stamped the bigger butterflies with sweet blush and then with the smaller butterfly stamp I stamped spring moss into the centers of the big flowers. Once I was done that I added crystal effects over all the butterflies I had just stamped. Then I stamped the matching large butterfly from the set on sweet blush c/s and covered it with crystal effects as well as the 2 small chocolate butterflies.
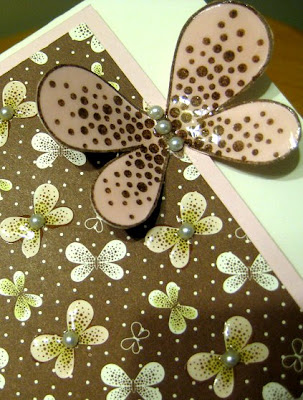 After the crystal effects all dried, I added these cute little pearls from hero arts and then I layered the pp on sweet blush and wrapped chocolate satin ribbon around and tied it in a simple know after adding 2 strips of sweet blush satin as well.
Just a hint: I used glue tape the stick the oink strips together in the shape of an "X" and then put a bit of glue on the back so it would stay in place as I tied the chocolate ribbon. Worked like a charm. I did not have to fiddle around with the ribbons at all.
The sentiment is from mixed messages stamped in dark chocolate on vintage cream c/s and cut out with a SU oval punch and layered on another oval of sweet blush. The last little effect was adding the teeny tiny butterflies on either side and finished them off with crystal effects.
Thursday, August 14, 2008
Suck it up, Buttercup!
Monday, August 11, 2008
Lavender & Chocolate
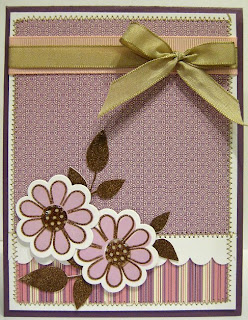 I am in love with The Papertrey Ink Dark Chocolate paper combined with....well anything and everything!! There is not a color on this planet that does not look spectacular with this paper!!
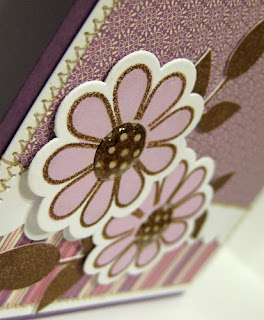 Next I cutout the flowers with my Cuttlebug and stamped them with lavender moon and dark chocolate (and yes that IS a bit of Crystal Effects in the centers of those pretty flowers) Then I stamped the leaf cluster from beautiful Blooms in dark chocolate and cut them out and stuck them here and there with mini glue dots.
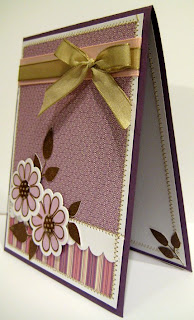 The inside is done again and this time I did stitching on the inside to match also. And weird no sentiment on this card yet. I couldn't decide what kind of card this should be so I guess will leave it blank until I need a card and then I can just add whatever I need to at that time.
See you tomorrow......Oh and as a side note. I do have a few posts scheduled as my BFF's wedding is coming up on the 16th and I happen to be the maid of honor. I will post pics hopefully as well.
Sunday, August 10, 2008
Masculine Birthday Card
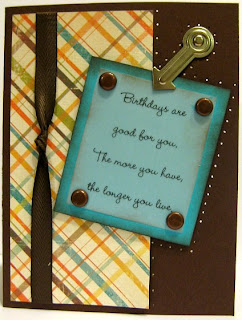
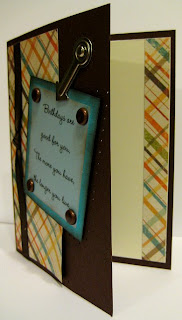 Just a short note to go with this one. The stunning paper is from MME!! Have I ever mentioned how much I love that paper? Well I do! A Lot! and I have hoarding issues with it and basic Grey in particular.
 Saturday, August 9, 2008
Cozy & Warm!
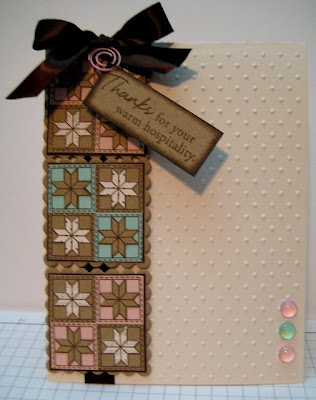 Ahhh! I can actually picture a quilt like this wrapped around me and my DH this coming winter, oh the warm thoughts. Anyway, I finally had this chance to play with my new Quilter's Sampler set from Papertrey Ink.
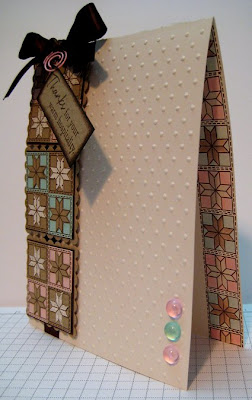
And so as not to disappoint, here is a glance at the inside. I stamped the same block up the side and used my aqua writer and re-inkers to colors them in.
Friday, August 8, 2008
Loonie Stampers Challenge #4
 The Time has come again, Loonie Stampers Challenge time that is. First off we are debating doing the challenge weekly rather then bi-weekly, opinions? comments? I think we should. We are all rocking them out!
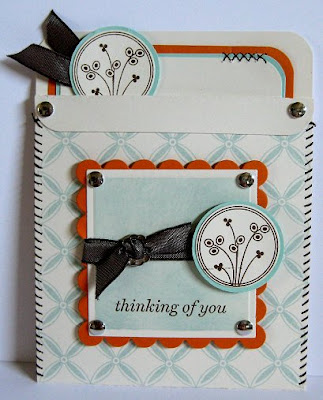
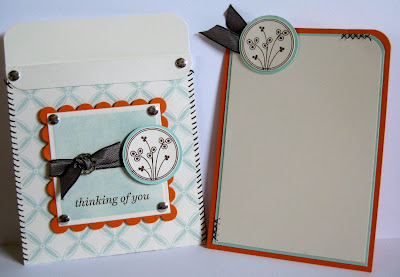
I decided to make a pocket card. However Shortly before I made this card I busted the needle on my sewing machine but HAD to do some stitching on this card. So I took out my piercing set from SU and set them aside for later.
Thursday, August 7, 2008
She is an Actress!
Total actress....but she is good at it!!
Loves Grammie's Shades!!
Wednesday, August 6, 2008
Kiwi Kiss meets Demi Designs
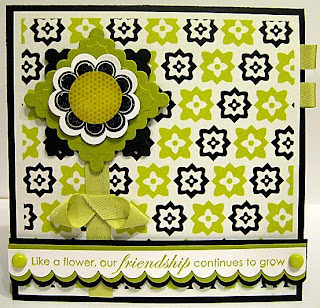 This is the first card I made with it. As soon as I pulled it out of the envelope I thought it would be a great match with Stampin' Up!'s new In Color, Kiwi Kiss. I trimmed the one design, called Zwinger, and mounted it on Basic Black. Then I used my nesties to make an odd kind of flower (the black and Kiwi layers) Then I cut the flowers from my cuttlebug and stamped it with black and kiwi kiss from the new Floral Frenzy Set. Then I used Spring Moss twill (which also matches this pattern paper nicely) and used it to make a stem and some leaves. I then made a triple layer scallop edge in 3 colors to stamp the sentiment on, added the brads from making memories, which also match incredibly well.
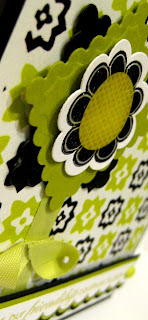 As a last touch I stayed in tune with my current addiction to using crystal effects (someone help me I can't stop!!!) and I filled in the flower with it. I like how the crystal effects intensifies the colors beneath it.
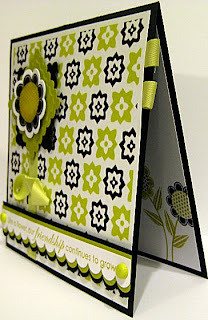
And as always, the inside stamped to match!
Thanks for stopping in to see my card of the day. Please head on over to Becky's blog and check out the "Demi Design" label found on the left hand navigation bar of her blog. Download them, Print them, you will NOT regret having done it!! oh and best of all......IT'S FREE!!


